
A couple of years ago, I found some very simple white frames on clearance at my local Target (I just LOVE perusing the end cap clearance section there!). They were dirt cheap, so I picked them up figuring I'd find something to do with them someday. I've used a few around the house, and recently noticed that I had one left. Since the frames were on clearance, they weren't in the best of shape. They had some scuff marks and scratches, but I knew I could freshen them up.
 |
This project is SUPER simple and quick! I've taken photos threw each step to help you create your own personalized frame.
1. I started with my plain, white frame. I made sure to clean it first to rid it of any dust.
2. I cut the word "love" in adhesive-backed vinyl using the Home Decor Solutions Cricut Cartridge. You can use any color vinyl you have on hand - it won't remain on the frame. After cutting the word out, I stuck it to my frame. Time to brag: I stuck it on right the very FIRST time! Wasn't expecting that at all! *giggle*
3. Once my word was secured onto the frame (I used my fingers to smooth down the edges so no paint would get underneath), I spray painted it in aqua. Tip: Be sure to spray with short, even strokes. You don't want to 'pool' the paint in any one spot.
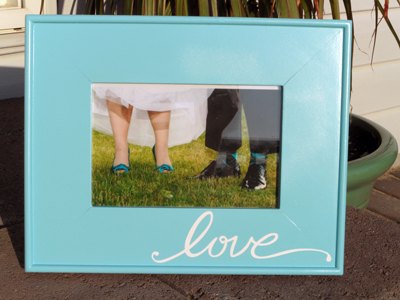
4. Once the frame was somewhat dry, I carefully removed the vinyl decal. The frame was still tacky as I was afraid if it dried too much, the paint around the word would come up with the word itself.
I love the way this frame turned out. In all, this project literally took about 20 minutes to complete. I used one of my favorite wedding photos in the frame and it now sits proudly in our foyer.
Thanks so much for stopping by today. I'll be back again tomorrow with another Cricut project for my Guest Designer Week at Everyday Cricut.
I hope you were inspired!
- Veronica


Love this idea. TFS --C
ReplyDeleteSooo cute. I'm going to have to do this!
ReplyDeletediantha@scicable.com
Veronica ~ OH MY WORD! This is so CLEVER and PERFECT! I LOVE the idea of placing the vinyl on first then painting it! What a COOL way to make the sentiment look so CLEAN! I LOVE this tip! AWESOME project!
ReplyDeleteLove this idea! So cute!! Need to try this! hugs
ReplyDeleteNancy
Very cute!
ReplyDelete